storyboardを使わずに姓名診断アプリを作る
ドットインストールの以下のレッスン
を、storyboardを使わずにswiftのみで作ってみる。
storyboardを使わないプロジェクト作成
これ参照
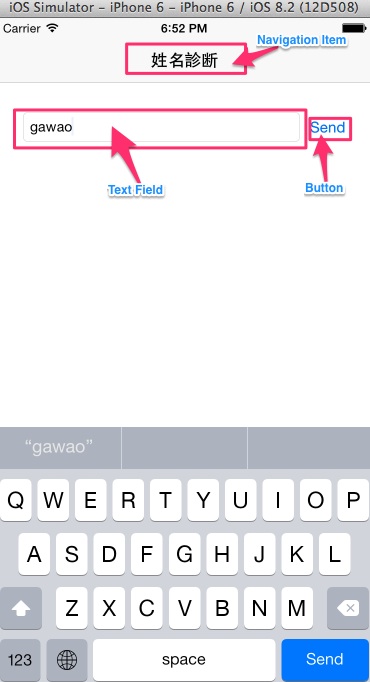
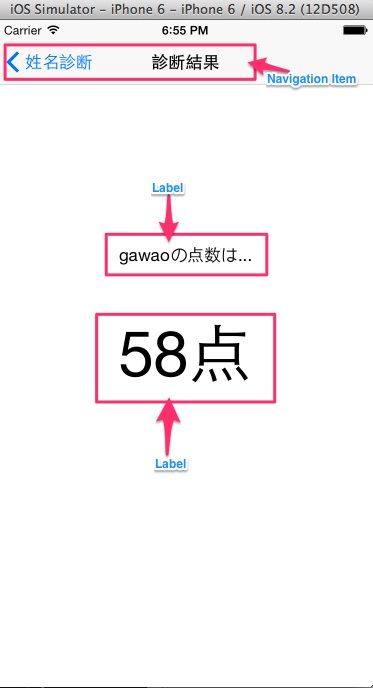
画面に必要な部品
姓名診断画面
診断結果画面
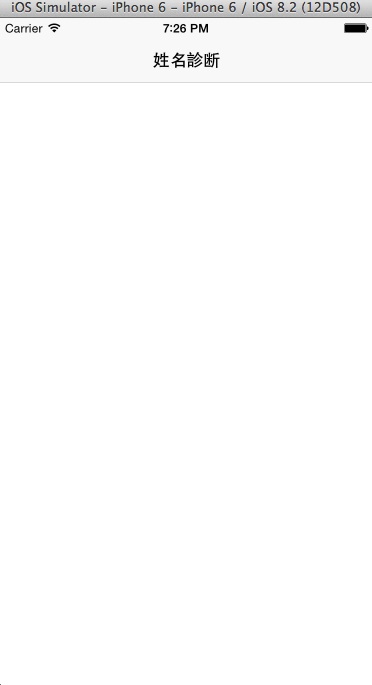
NavigationControllerを設置してタイトルを表示
参考
012 UINavigationControllerの表示 - Swift Docs
コード
AppDelegate.swift 抜粋
var window: UIWindow?
var myNavigaionController: UINavigationController?

func application(application: UIApplication, didFinishLaunchingWithOptions launchOptions: [NSObject: bject]?) -> Bool {

    // ViewControllerを生成
    let myFirstViewController: ViewController = ViewController()
    // Navigation Controllerを生成
    myNavigaionController = UINavigationController(rootViewController: myFirstViewController)

    self.window = UIWindow(frame: UIScreen.mainScreen().bounds)
    self.window?.backgroundColor = UIColor.whiteColor()
    // Navigation ControllerをrootViewControllerに設定
    self.window?.rootViewController = myFirstViewController
    self.window?.makeKeyAndVisible()

    return true
}
ViewController.swift(姓名診断画面) 抜粋
override func viewDidLoad() {
    super.viewDidLoad()

    // タイトルを設定する
   self.title = "姓名診断"
}
実行結果
ViewControllerの追加と部品の配置
参考
- 012 UINavigationControllerの表示 - Swift Docs
- 004 UITextFieldで文字を入力 - Swift Docs
- 001 UILabelで文字を表示 - Swift Docs
- 002 UIButtonでボタンを表示 - Swift Docs
- UITextfieldで文字を編集する - Swiftサラリーマン
コード
ViewController.swift(姓名診断画面)
import UIKit

class ViewController: UIViewController, UITextFieldDelegate {

    let sendButton: UIButton = UIButton()

    override func viewDidLoad() {
        super.viewDidLoad()

        // Controllerのタイトルを設定する
        self.title = "姓名診断"

        // UITextFieldを作成する
        let name: UITextField = UITextField(frame: CGRectMake(0, 0, 300, 30))
        // 最初に表示する文字を設定
        name.text = "名前を入力"
        // Delegateを設定する
        name.delegate = self
        // 枠を表示する
        name.borderStyle = UITextBorderStyle.RoundedRect
        // UITextFieldの表示する位置を設定
//        name.layer.position = CGPoint(x: self.view.frame.width/2, y: 150)
        name.layer.position = CGPoint(x: 160, y: 150)
        // Viwに追加する
        self.view.addSubview(name)

        // 送信ボタンを設定する
        sendButton.frame = CGRectMake(0, 0, 50, 40)
        // 背景色を設定する
        sendButton.backgroundColor = UIColor.lightGrayColor()
        sendButton.showsTouchWhenHighlighted = true
        // 枠を丸くする
        sendButton.layer.masksToBounds = true
        // タイトルを設定する
        sendButton.setTitle("Send", forState: UIControlState.Normal)
        sendButton.setTitleColor(UIColor.blackColor(), forState: UIControlState.Normal)
        // コーナーの半径を設定する
        sendButton.layer.cornerRadius = 10.0
        // ボタンの位置を指定する
        sendButton.layer.position = CGPoint(x: 340, y: 150)
        // タグを設定する
        sendButton.tag = 1
        // イベントを追加する
        sendButton.addTarget(self, action: "showResult:", forControlEvents: .TouchUpInside)
        // ボタンをViewに追加する
        self.view.addSubview(sendButton)

    }

    /*
        ボタンイベント
    */
    func showResult(sender: UIButton) {
        // 移動先のViewを定義する
        let resultViewController = ResultViewController()
        // ResultViewに移動する
        self.navigationController?.pushViewController(resultViewController, animated: true)
    }

    override func didReceiveMemoryWarning() {
        super.didReceiveMemoryWarning()
        // Dispose of any resources that can be recreated.
    }
}
ResultViewController(診断結果画面)
import UIKit

class ResultViewController: UIViewController {
    override func viewDidLoad() {
        super.viewDidLoad()

        // Controllerのタイトルを設定
        self.title = "診断結果"

        // Labelを作成
        let label: UILabel = UILabel(frame: CGRectMake(0, 0, 200, 40))
        // 背景色を付ける
        label.backgroundColor = UIColor.lightGrayColor()
        // 文字を代入
        label.text = "あなたの点数は…"
        // テキストを中央寄せにする
        label.textAlignment = NSTextAlignment.Center
        // ラベルを配置する座標を設定する
        label.layer.position = CGPoint(x: self.view.bounds.width / 2, y: 200)
        // ViewにLabelを追加
        self.view.addSubview(label)

        // 診断結果表示Labelを作成
        let resultLabel: UILabel = UILabel(frame: CGRectMake(0, 0, 200, 80))
        // 枠線を付ける
        resultLabel.layer.borderColor = UIColor.redColor().CGColor
        // 枠線の太さ
        resultLabel.layer.borderWidth = 2.0
        // 文字を代入
        resultLabel.text = "100点"
        // テキストを中央寄せ
        resultLabel.textAlignment = NSTextAlignment.Center
        // フォントサイズを大きくして太字に
        resultLabel.font = UIFont.boldSystemFontOfSize(64)
        // ラベルを配置する座標を設定する
        resultLabel.layer.position = CGPoint(x: self.view.bounds.width / 2, y: 300)
        // ViewにLabelを追加
        self.view.addSubview(resultLabel    )

    }
    override func didReceiveMemoryWarning() {
        super.didReceiveMemoryWarning()
    }
}
実行結果

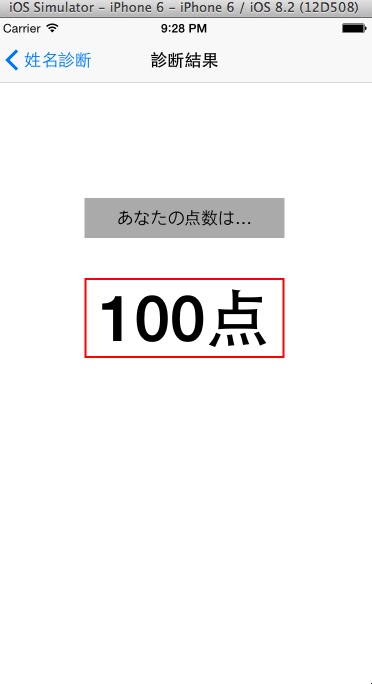
ここまでで、
Sendボタンをクリックして診断結果画面に遷移- 診断結果画面から姓名診断画面に遷移
は出来た
姓名診断のText Fieldで入力した値のチェック・値を診断結果画面に表示・点数を表示
参考
010 UIAlertControllerでアラートを表示 - Swift Docs
ここではまってしまった。。。
segueを使わないで画面間で値を受け渡すやり方がわからずに2時間くらい悩んでいた。
名前受け渡し用の変数を作り、そこに値をセットするようにしたら出来たが、これでいいのか・・
コード
ViewController.swift(姓名診断画面)
import UIKit

class ViewController: UIViewController, UITextFieldDelegate {

    let sendButton: UIButton = UIButton()
    var nameField: UITextField!

    override func viewDidLoad() {
        super.viewDidLoad()

        // Controllerのタイトルを設定する
        self.title = "姓名診断"

        // UITextFieldを作成する
        nameField = UITextField(frame: CGRectMake(0, 0, 300, 30))
        // 最初に表示する文字を設定
        nameField.placeholder = "名前を入力"
        // Delegateを設定する
        nameField.delegate = self
        // 枠を表示する
        nameField.borderStyle = UITextBorderStyle.RoundedRect
        // UITextFieldの表示する位置を設定
        nameField.layer.position = CGPoint(x: 160, y: 150)
        // Viwに追加する
        self.view.addSubview(nameField)

        // 送信ボタンを設定する
        sendButton.frame = CGRectMake(0, 0, 50, 40)
        // 背景色を設定する
        sendButton.backgroundColor = UIColor.lightGrayColor()
        sendButton.showsTouchWhenHighlighted = true
        // 枠を丸くする
        sendButton.layer.masksToBounds = true
        // タイトルを設定する
        sendButton.setTitle("Send", forState: .Normal)
        sendButton.setTitleColor(UIColor.blackColor(), forState: .Normal)
        // コーナーの半径を設定する
        sendButton.layer.cornerRadius = 10.0
        // ボタンの位置を指定する
        sendButton.layer.position = CGPoint(x: 340, y: 150)
        // タグを設定する
        sendButton.tag = 1
        // イベントを追加する
        sendButton.addTarget(self, action: "showResult:", forControlEvents: .TouchUpInside)
        // ボタンをViewに追加する
        self.view.addSubview(sendButton)

    }

    /*
        ボタンイベント
    */
    func showResult(sender: UIButton) {
        // 空文字チェック
        if nameField.text == "" {
            showAlert()
        } else {
            // 移動先のViewを定義する
            let resultViewController = ResultViewController()
            // ResultViewに移動する
            self.navigationController?.pushViewController(resultViewController, animated: true)

            // TODO これで渡せるな・・?
            resultViewController.myName = nameField.text
        }
    }
    /*
        エラーアラートを表示
    */
    func showAlert() {
        // UIAlertControllerを作成する
        let myAlert = UIAlertController(title: "エラー", message: "診断したい名前を入力してください", preferredStyle: .Alert)
        // OKのアクションを作成する
        let myOkAction = UIAlertAction(title: "OK", style: .Default, handler: nil)
        // OKのアクションを追加する
        myAlert.addAction(myOkAction)
        // UIAlertを発動する
        presentViewController(myAlert, animated: true, completion: nil)

    }

    /*
    改行ボタンが押された際に呼ばれる
    */
    func textFieldShouldReturn(textField: UITextField) -> Bool {

        // returnを押すとキーボードが隠れる
        textField.resignFirstResponder()

        // sendButtonと同じ処理を
        sendButton.sendActionsForControlEvents(.TouchUpInside)
        return true
    }

    /*
        UITextFieldが編集された直後に呼ばれる
    */
    func textFieldDidBeginEditing(textField: UITextField) {
        println("textFieldDidBeginEditing: \(textField.text)")
    }

    /*
        UITextFieldが編集終了する直前に呼ばれる
    */
    func textFieldShouldEndEditing(textField: UITextField) -> Bool {
        println("textFieldShouldEndEditing: \(textField.text)")
        return true
    }

    override func didReceiveMemoryWarning() {
        super.didReceiveMemoryWarning()
        // Dispose of any resources that can be recreated.
    }
}
ResultViewController(診断結果画面)
import UIKit

class ResultViewController: UIViewController {

    // 入力された名前を入れる
    var myName: String = ""

    override func viewDidLoad() {
        super.viewDidLoad()

        // Controllerのタイトルを設定
        self.title = "診断結果"

        // Labelを作成
        let label: UILabel = UILabel(frame: CGRectMake(0, 0, 200, 40))
        // 背景色を付ける
        label.backgroundColor = UIColor.lightGrayColor()
        // 名前を代入
        label.text = "\(myName)の点数は…"
        // テキストを中央寄せにする
        label.textAlignment = NSTextAlignment.Center
        // ラベルを配置する座標を設定する
        label.layer.position = CGPoint(x: self.view.bounds.width / 2, y: 200)
        // ViewにLabelを追加
        self.view.addSubview(label)

        // 診断結果表示Labelを作成
        let resultLabel: UILabel = UILabel(frame: CGRectMake(0, 0, 200, 80))
        // 枠線を付ける
        resultLabel.layer.borderColor = UIColor.redColor().CGColor
        // 枠線の太さ
        resultLabel.layer.borderWidth = 2.0
        // 点数を表示
        let score = arc4random_uniform(101)
        resultLabel.text = "\(score)点"
        // テキストを中央寄せ
        resultLabel.textAlignment = NSTextAlignment.Center
        // フォントサイズを大きくして太字に
        resultLabel.font = UIFont.boldSystemFontOfSize(64)
        // ラベルを配置する座標を設定する
        resultLabel.layer.position = CGPoint(x: self.view.bounds.width / 2, y: 300)
        // ViewにLabelを追加
        self.view.addSubview(resultLabel)

    }
    override func didReceiveMemoryWarning() {
        super.didReceiveMemoryWarning()
    }
}

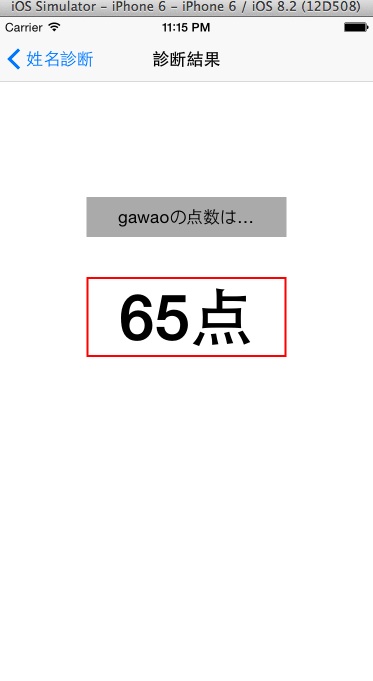
ここまでで大体機能は出来たので、細かいところを変更
修正点
結果画面から姓名診断画面に戻った時に名前が入ったままなので消す
姓名診断画面を表示した時にテキストフィールドにフォーカスをセットする
参考
UITextField、UITextViewのフォーカス制御 - iOSアプリ開発トピック
ViewController.swift(姓名診断画面)
    /*
        Viewが表示される直前に行う処理
    */
    override func viewWillAppear(animated: Bool) {
        super.viewWillAppear(animated)
        // 名前入力テキストフィールドを空にする
        nameField.text = ""
        // 名前入力テキストフィールドにフォーカスする
        nameField.becomeFirstResponder()
    }
キーボートのreturnをSendに変える
参考
UITextField/UITextViewの文字入力で覚えておくと便利なこと
ViewController.swift(姓名診断画面)
override func viewDidLoad() {
// 〜省略〜
        // キーボードのReturnキーをSendに変える
        nameField.returnKeyType = UIReturnKeyType.Send
        // Viwに追加する
        self.view.addSubview(nameField)
// 〜省略〜
}
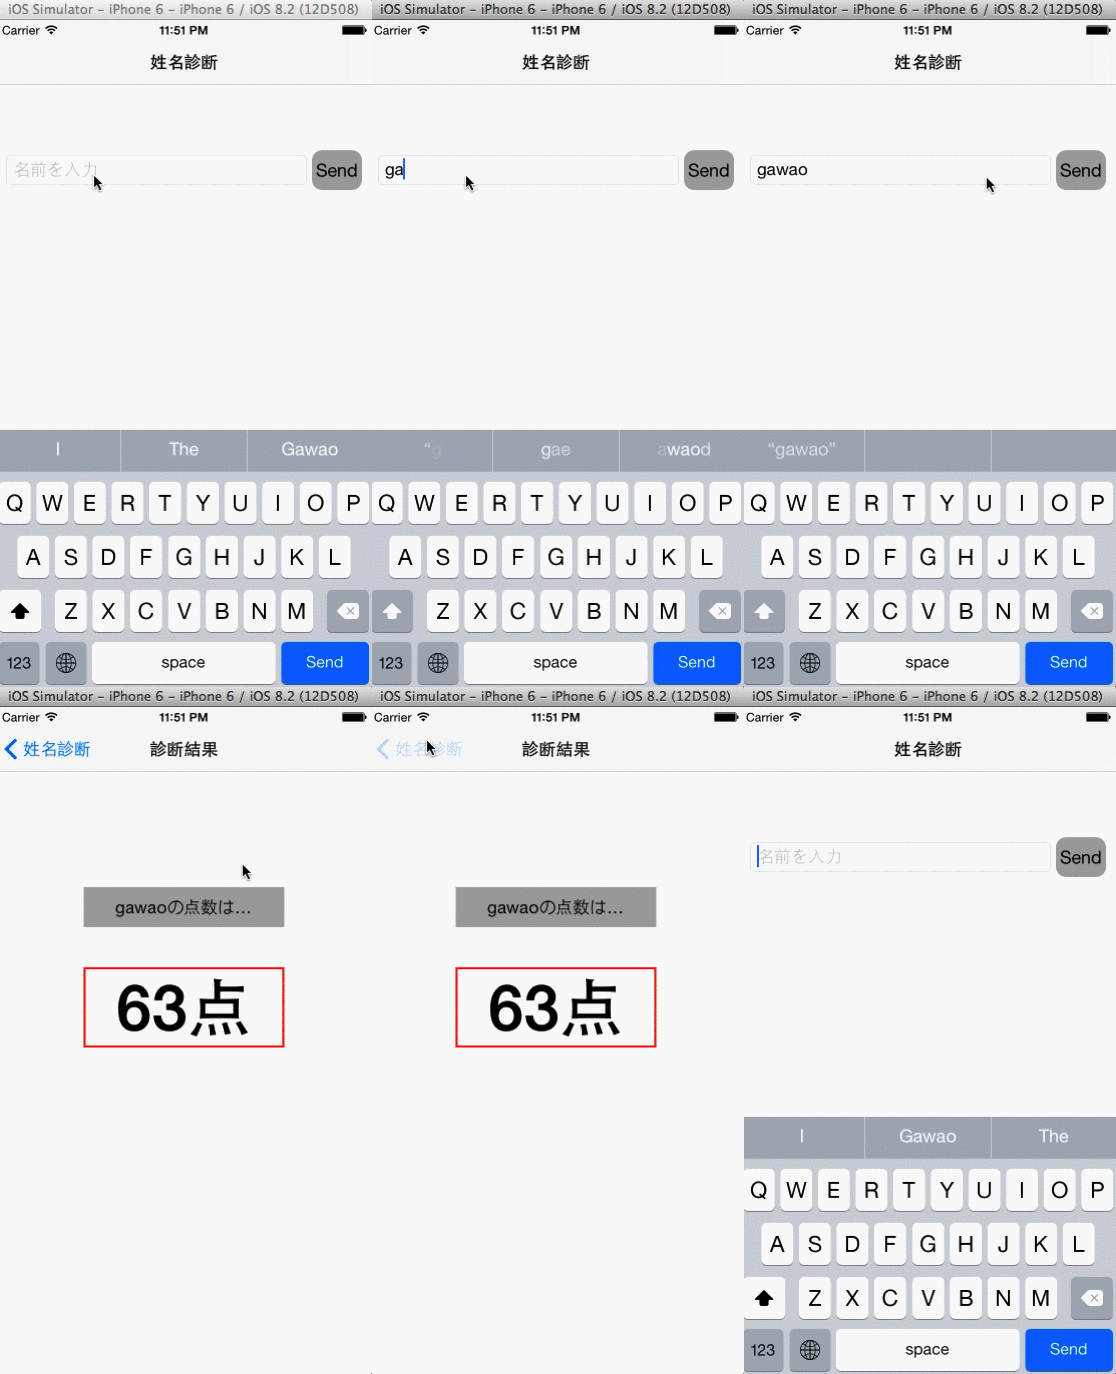
結果画面を表示したときに姓名診断画面の「テキストフィールドとボタン」が少しの間表示されているので消す
こんなやつ
ResultViewController(診断結果画面)
    /*
    Viewが表示される直前に行う処理
    */
    override func viewWillAppear(animated: Bool) {
        super.viewWillAppear(animated)
        // TODO viewの背景色を設定
        // これで前の画面の残像(テキストフィールドとボタン)は消えたけど・・・??
        self.view.backgroundColor = UIColor.whiteColor()
    }
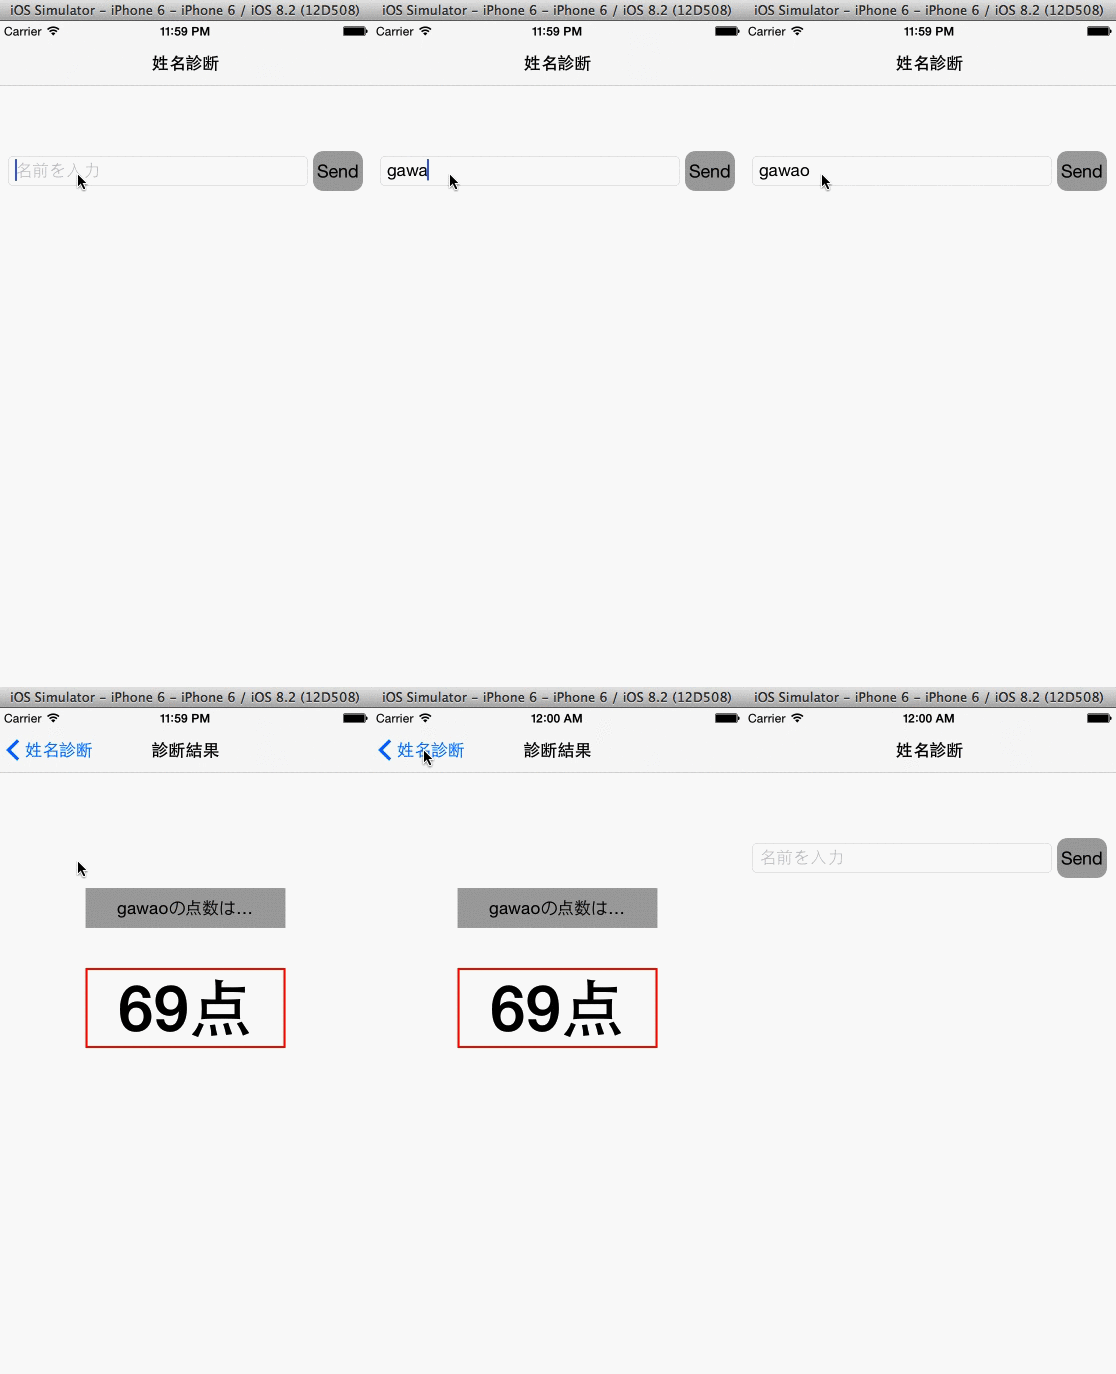
残像が消えたようだけどこれでいいのか・・・??
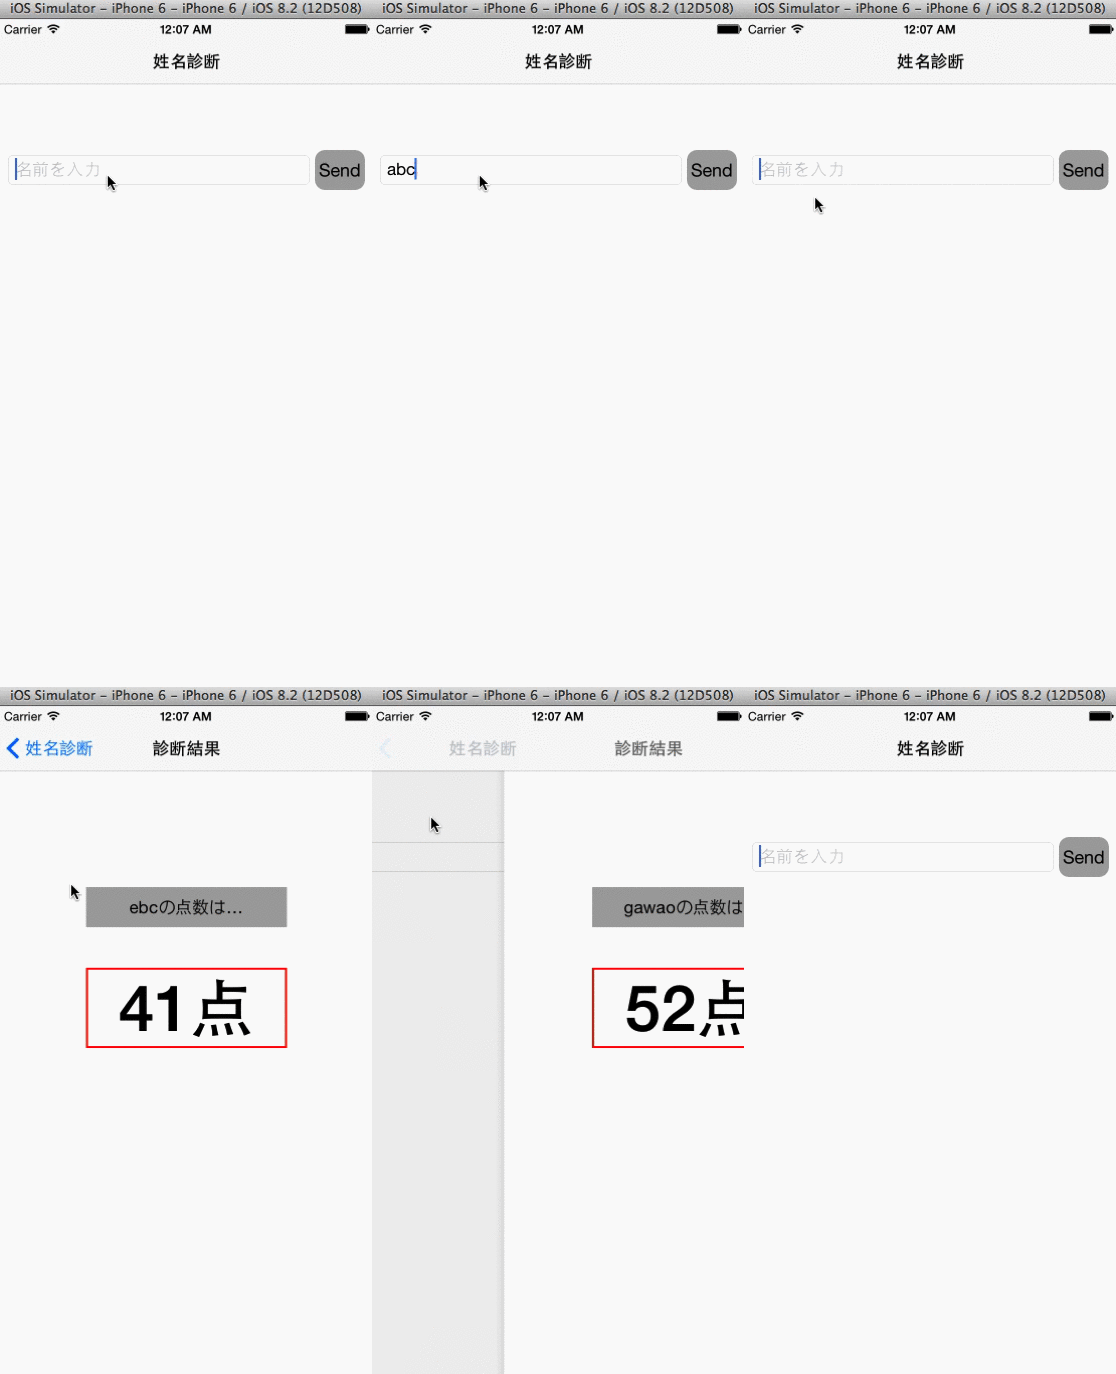
完成
画面
コード
やりたいことは出来ましたが、何だかスッキリしない(>_<)